Something happened this weekend, you guys… something that I’m still in denial about.

My baby girl, my first born and my oldest daughter turned nine! Nine!?

How is this possible? It truly feels like yesterday that this sweet little redhead was born. And now we are looking the end of her first decade in the eye.

Sigh.

So when this sweet one, who also happens to be mommy’s biggest fan, was asked what she wanted for her birthday cake this year and she replied (with a gleam in her eye) that she “had a challenge” for me, I knew this would be good.

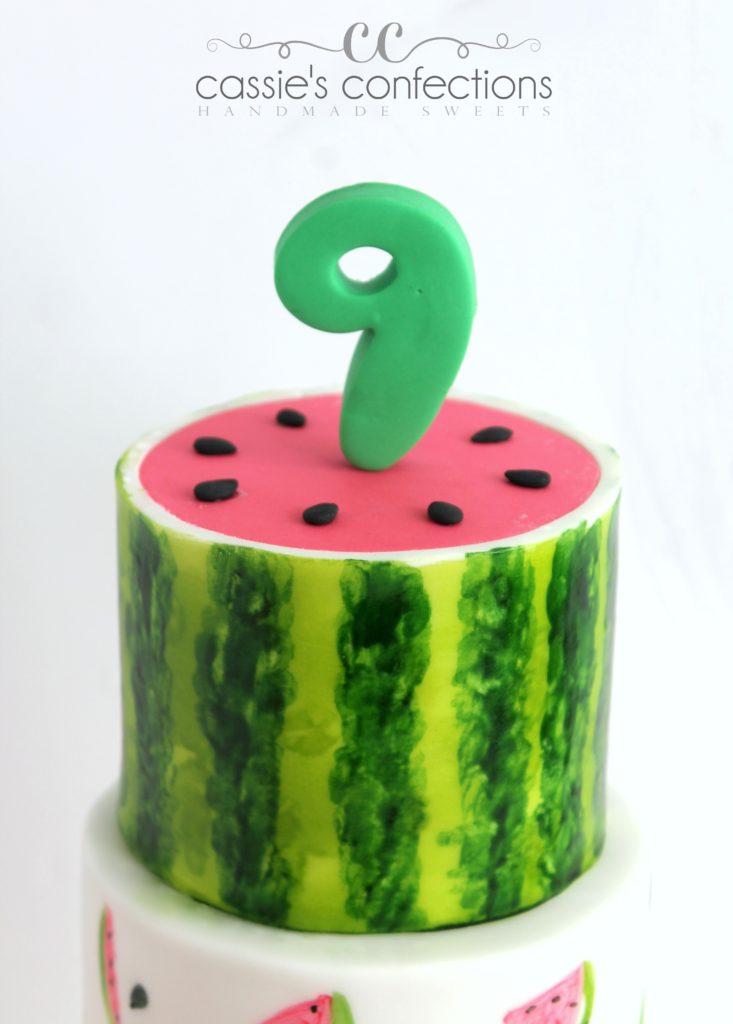
Her requested theme? “A watermelon sleepover”.

So, you know what? The girl got a watermelon sleepover!

The party itself was adorable! Watermelon balloons, plates and favors, along with various other pink, red and green details.

I decided to satisfy my need for a “pretty” cake with the actual cake, and use the decorations to create the sleepover portion of the theme. Since she was only having a couple of friends over and the cake size would need to be small, I opted to put the characters on the board instead of the cake.

I wanted to give my #1 fan an awesome sleepover cake, so I took it one step further and created the hand-modeled characters to actually resemble her best friend and cousin, the two sleepover guests at her party!

The characters are created out of fondant, and I used a brand new (unused) dish scrubber to give a sort of carpet texture to the fondant on the board.

I hand-painted the entire cake itself, and I put together the video tutorial below to show how I created the top watermelon tier!

My sweet girl was so thrilled when she saw her cake! Creating my own kids’ birthday cakes bring me so much joy!

Tools used in this project:

This week I created a shoe-lover’s dream! A shoe… cake!

When a return customer contacted me to order a cake for his wife, I was thrilled because, as I told him, I love making grown-up girl celebration cakes! He then told me about his wife’s love for shoes and I knew this would be a fun one.

I had just one week prior seen an amazing magnetic shoe mold via a YouTube video and had to pull my finger away from the purchase button about three times, reminding myself that I had no immediate use for it. Side note: does anyone else find humor in the fact that I had to use self control not to buy a shoe mold?? That is a true cake decorator for you! I will count my husband lucky (and we won’t discuss my handbag addiction). 😉

Anyway, I immediately jumped back online and grabbed the shoe mold that had been my heart’s desire. When it arrived, I eagerly sliced open the box and ran downstairs to my bakery, and it only took me one wasted try before I found success!

Isn’t that a seriously gorgeous, shiny, smooth piece of chocolate “designer” footwear? I added the edible jewel for more wow, and I’m really not sure if I wanted to eat it or wear it! Hopefully my customer felt conflicted in the same way.

I then created a “shoebox” cake in a similar manner to how I created last week’s chocolate box cake (you can watch the video here), but with modeling chocolate since my customer is not the biggest fan of fondant. I did a 50/50 mixture of modeling chocolate and fondant only for the top panel in order to be able to paint the logo on the top (food coloring beads up on modeling chocolate).

I used the fabulous wafer paper rose tutorial from Cakeheads.com to add a beautiful detail next to the shoe box. I printed my wafer paper two shades of purple using my edible printer.

I put the cake on a textured fondant cake board and was done!

This cake made my eyes happy!

Tools used in this project:

Classes you might enjoy: