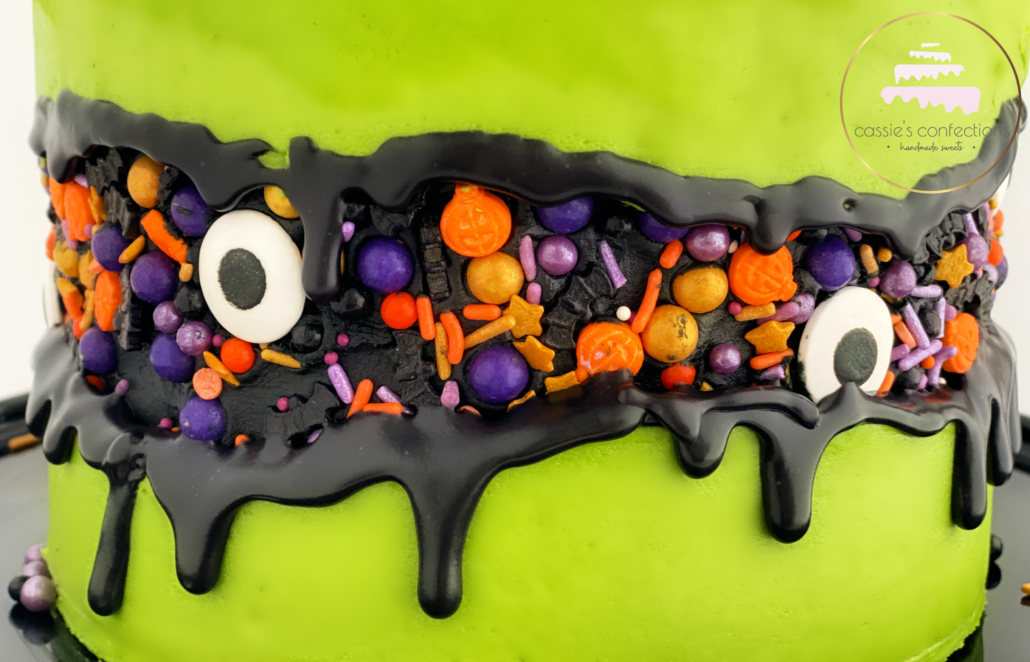
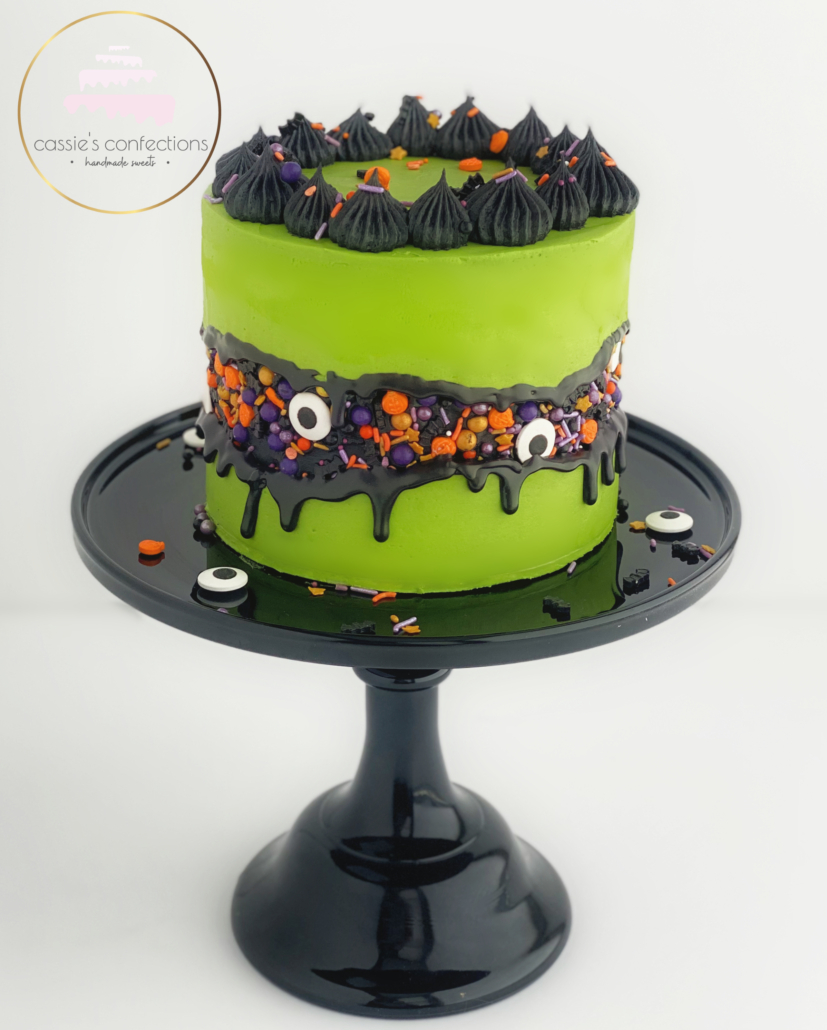
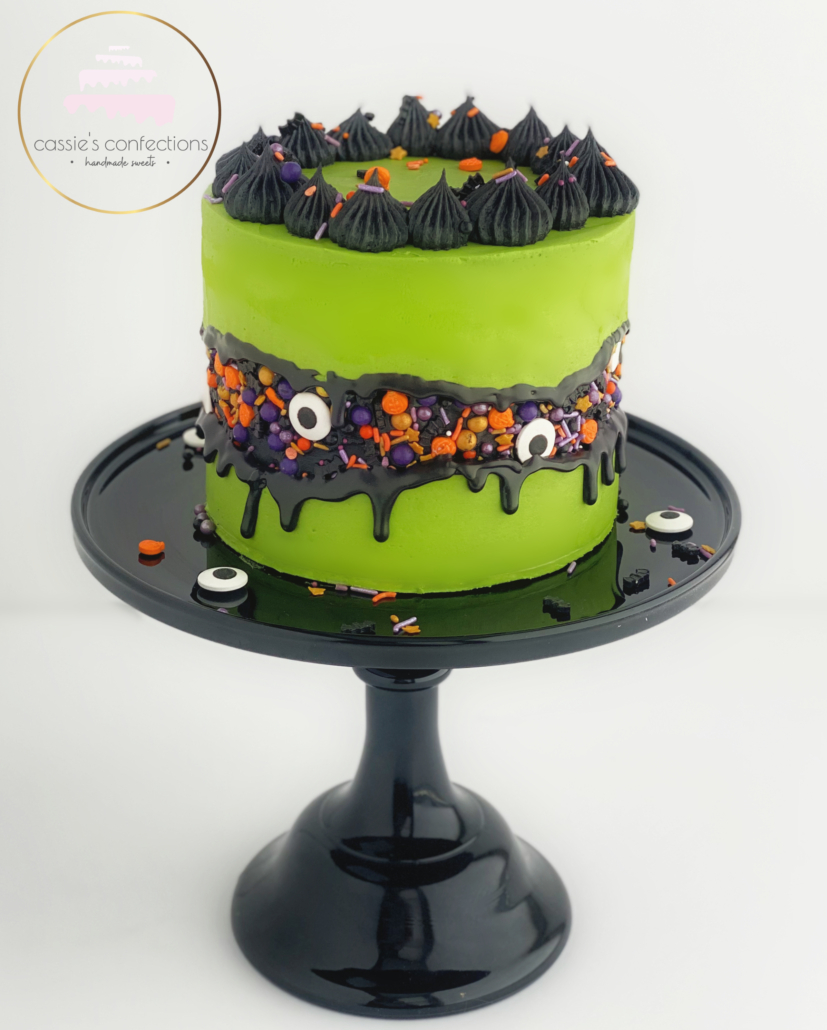
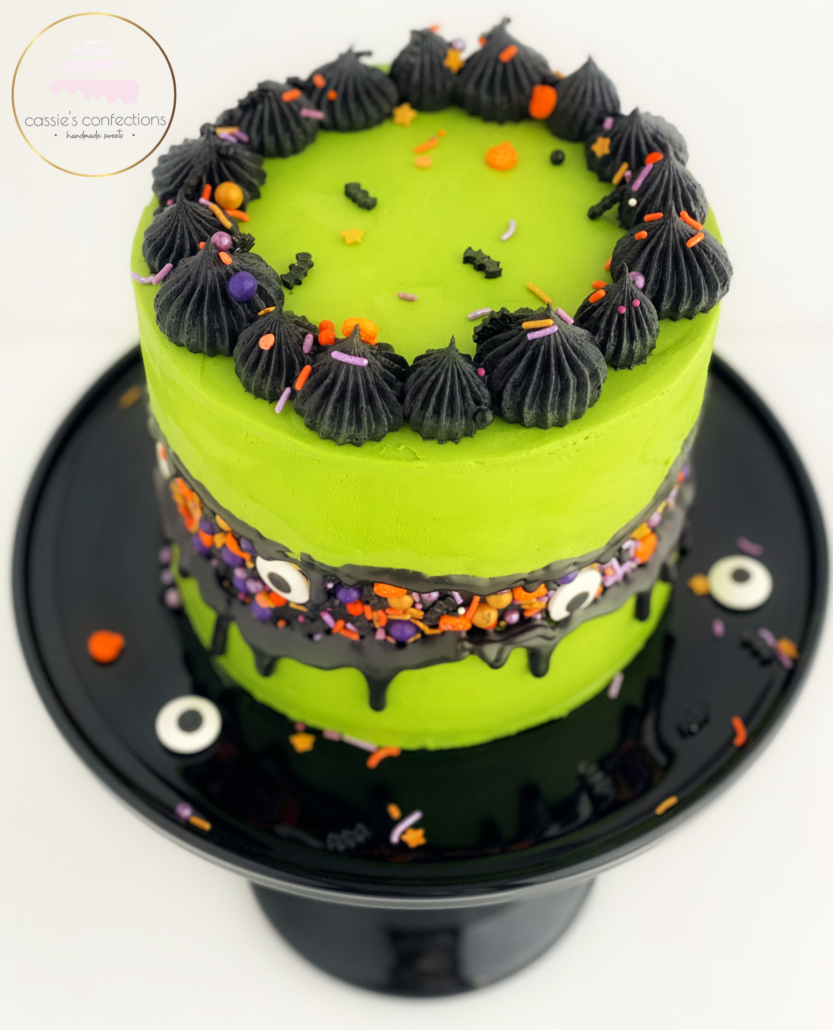
Where are my Halloween lovers? This week I have a super cute and simple Halloween cake for you all!

The plan for this cake began with the fault line cake trend that has been circling lately. As with all new cake trends, I have of course been dying to try this technique! Halloween seemed like the perfect time to do so, and lucky for me, there didn’t seem to be many Halloween theme fault-line cakes out there just yet.

I won’t be lying when I say I was winging it a bit on this cake! I thought, how hard can it be? I know those are famous last words, especially in *my* bakery, but I went for it anyway.
The best part about this cake was that I remembered to take photos along the way so I can share it with you!

The first step, as always, is to stack and fill your cake. Although I normally don’t feel it necessary, I went ahead and crumb coated this cake as well. After applying the crumb coat, chill the cake for 10-15 minutes.
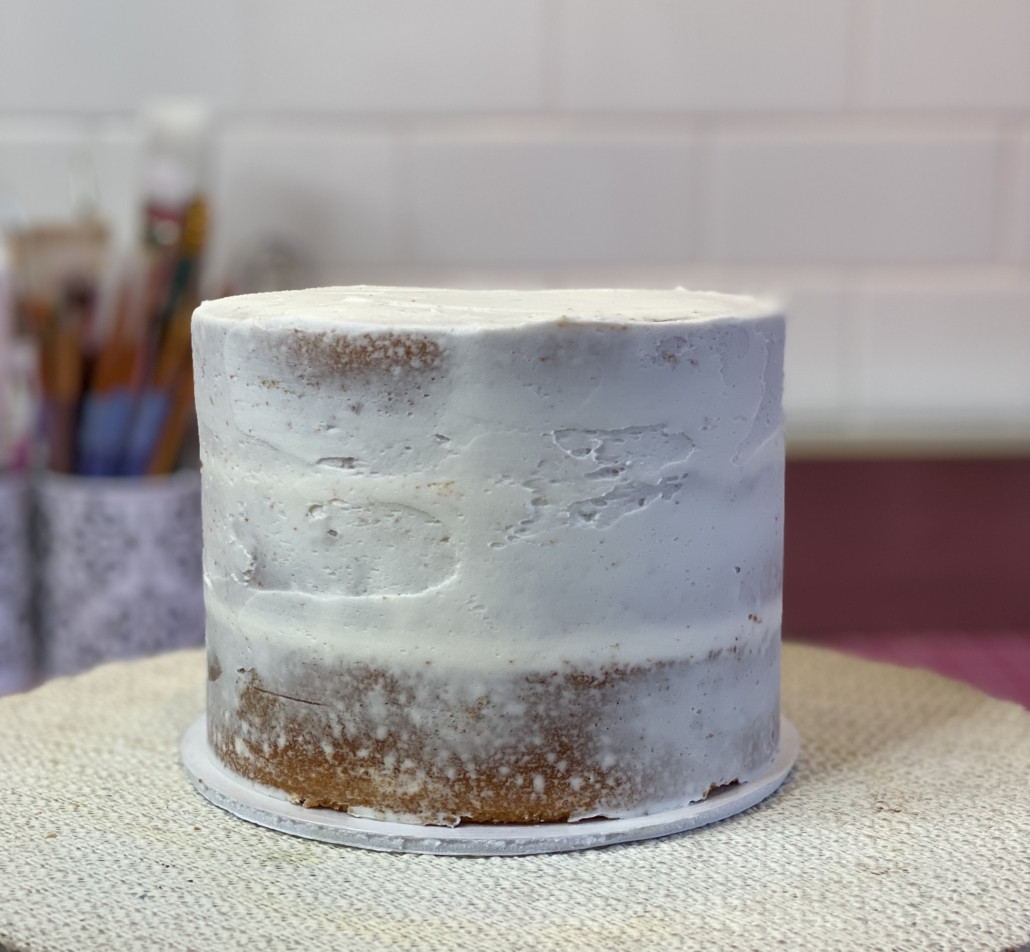
Using an offset spatula, apply a thin layer of black royal icing around the center of the cake. I used a bench scraper to smooth the line as thin as possible without exposing the cake underneath.
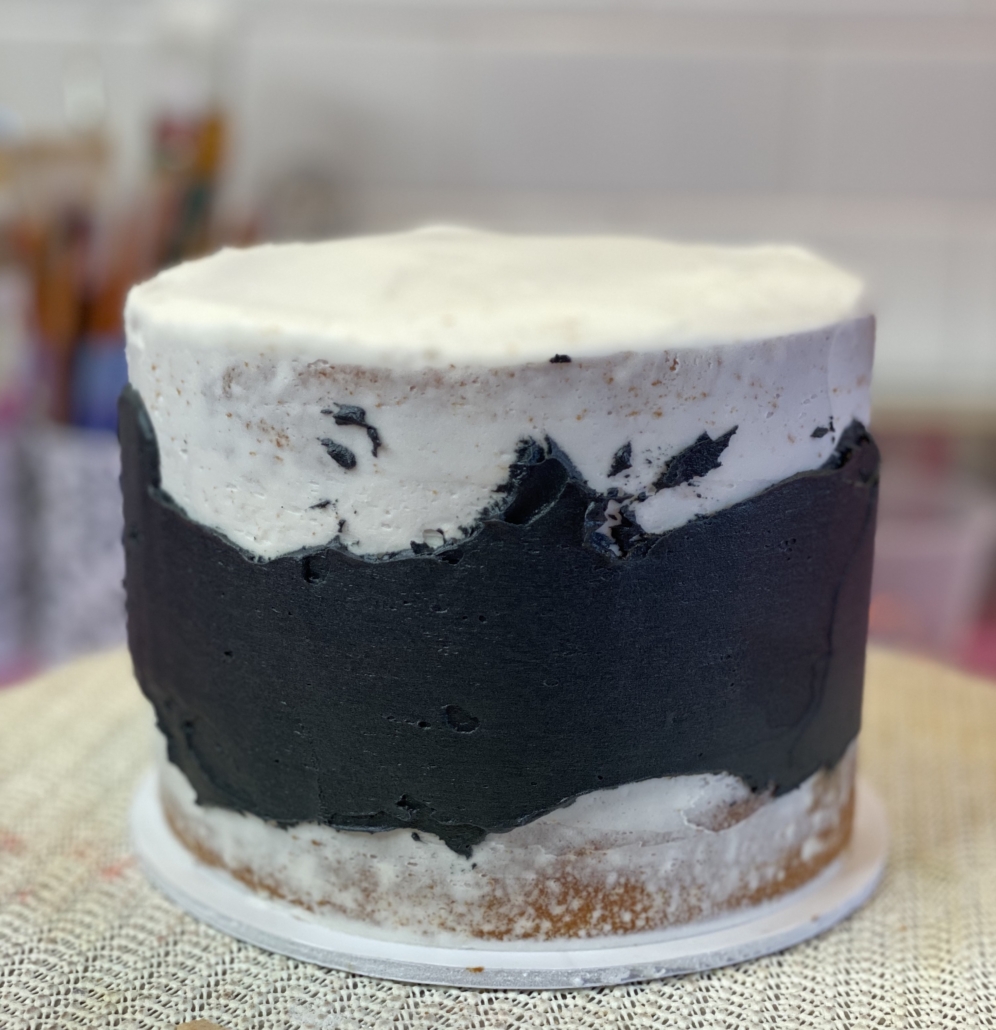
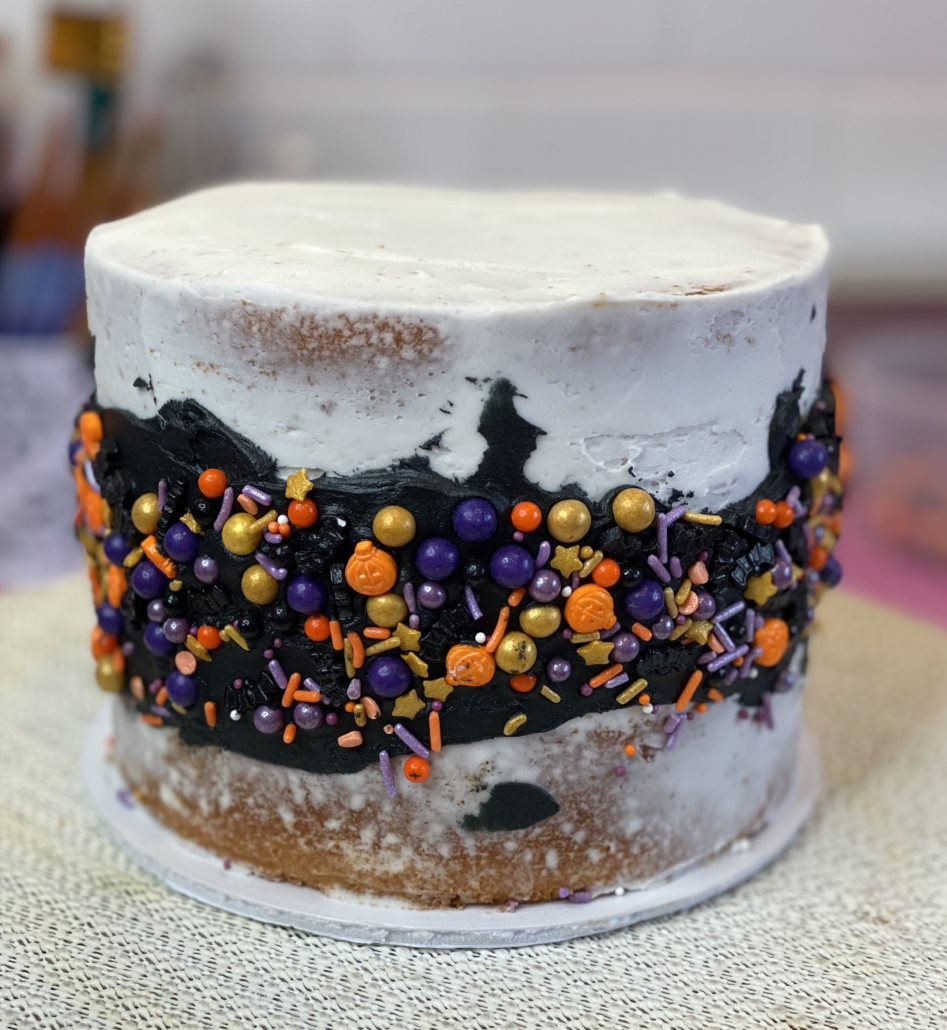
Next, grab your favorite sprinkle mix! Using your hand, apply the sprinkles all over the black buttercream while the buttercream is still room temperature and uncrusted. Try to cover most of the buttercream with sprinkles, but it doesn’t need to be completely perfect.
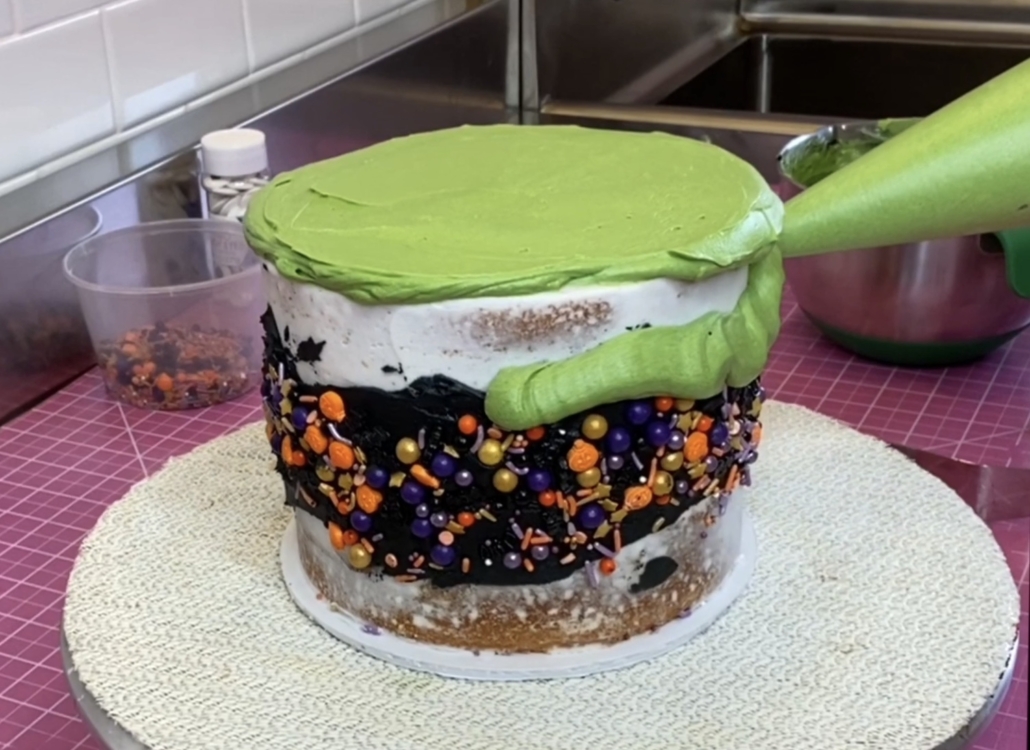
The next step is to apply our main buttercream layer. I created the perfect halloween green using a mixture of avocado green and electric green. After icing the top like you normally would, you will need to spoon some into a piping bag and pipe the border around your black/sprinkle mixture, both the top and the bottom.
Then you can uses the same piping back to fill in the rest of the buttercream around the cake, and smooth it with a hot bench scraper.
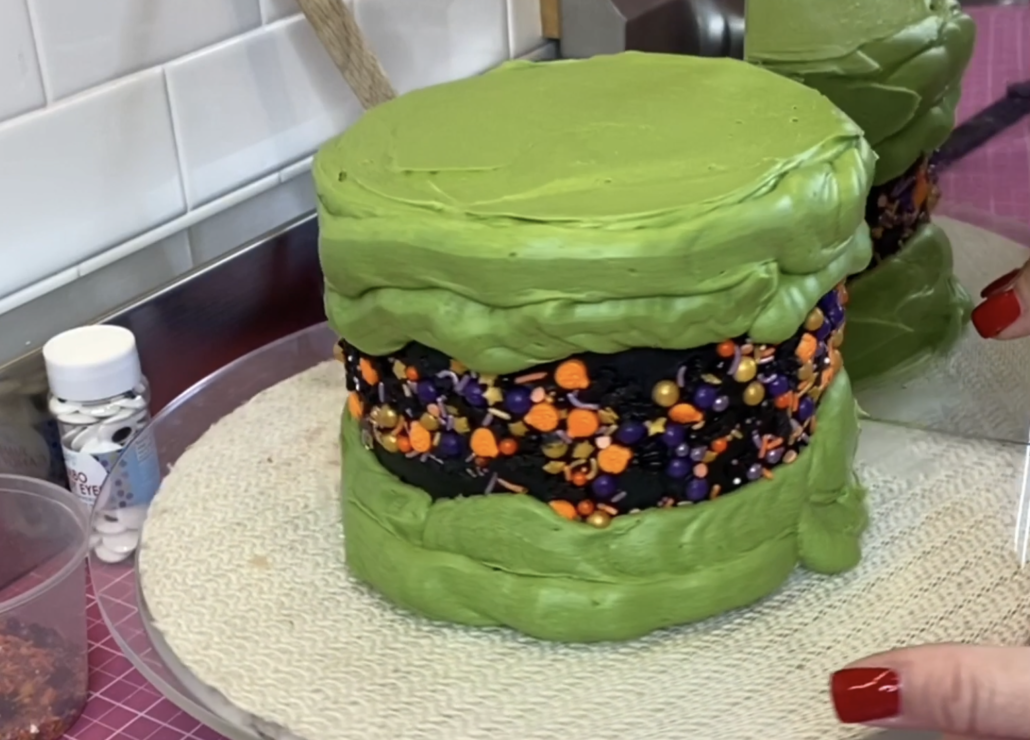
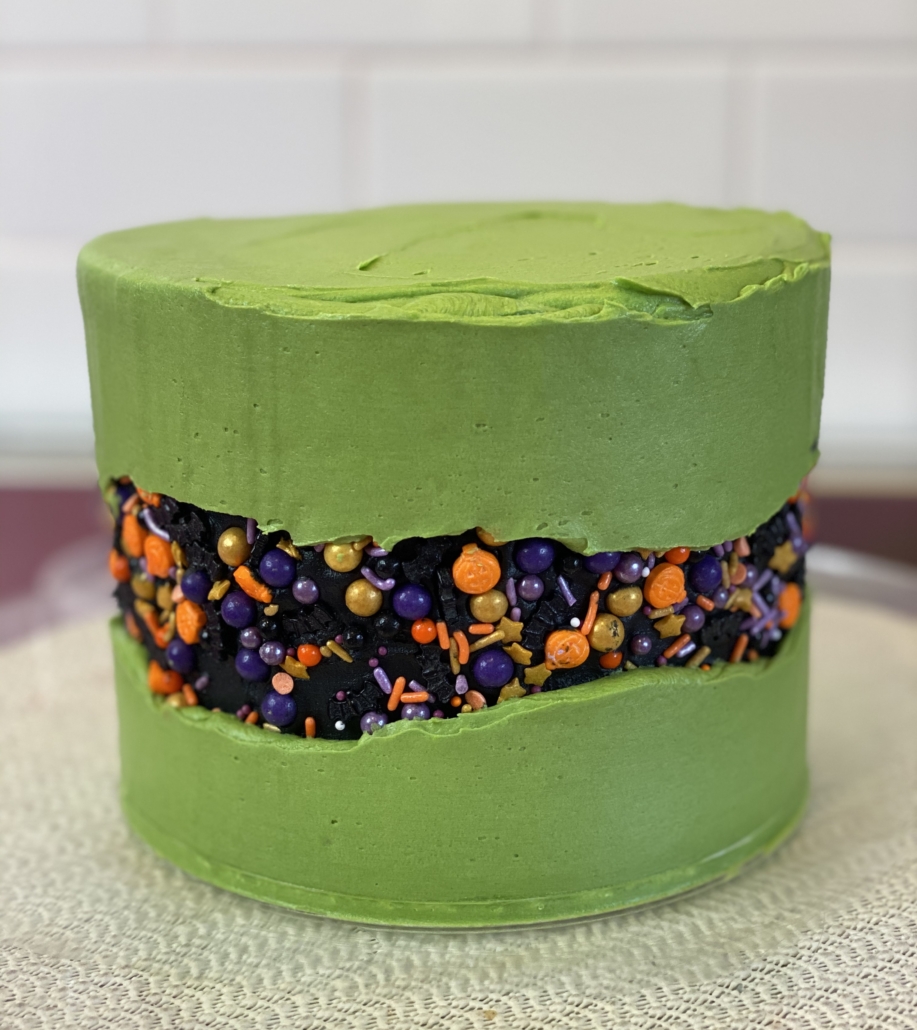
The line around your fault should be jagged… the more jagged the better!

Next you can go back in and apply eyeballs or any larger sprinkles you would like to include. I didn’t apply them with the rest of the sprinkles because I did not want them to interfere with my smoothing by sticking out too far.
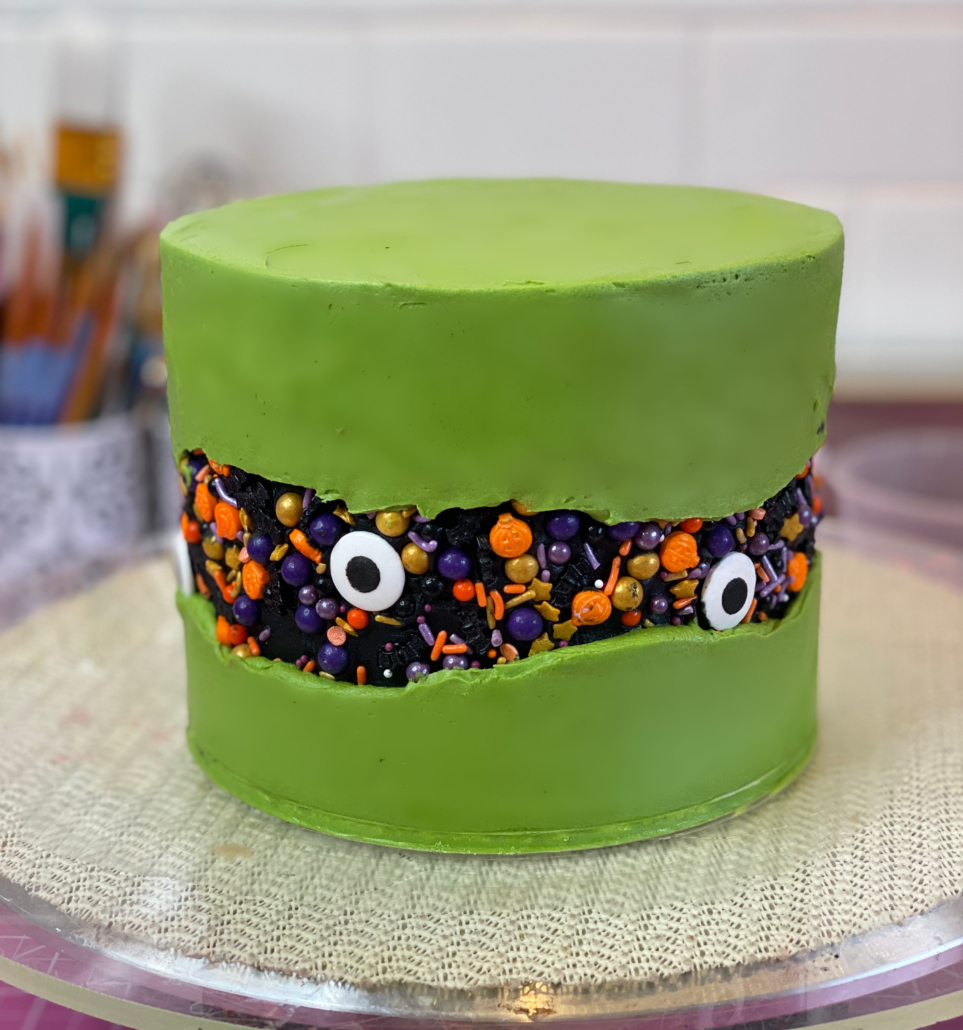
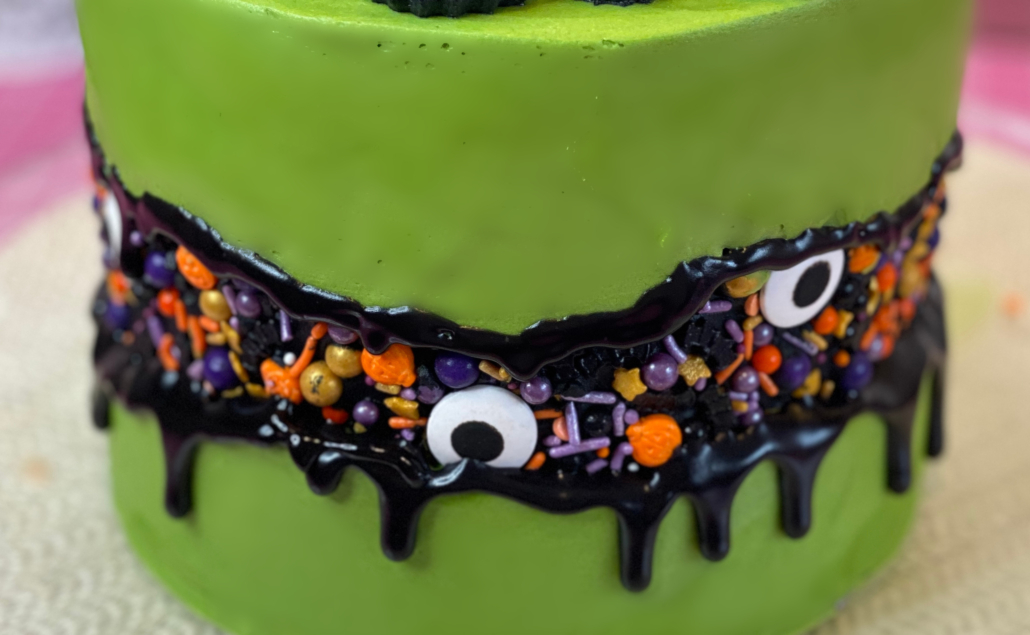
The next step to creating this adorable spooky cake is to apply some drip to the tops and bottom of the fault line.
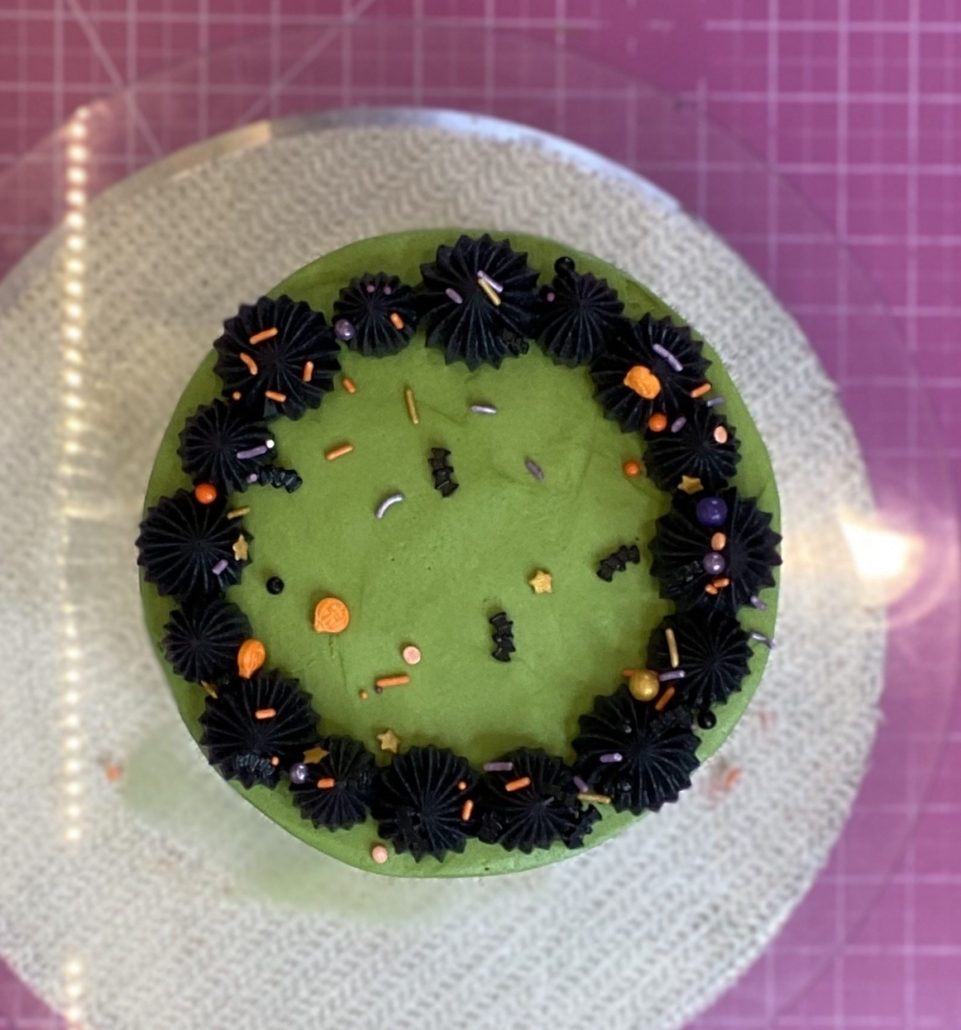
The final thing to add to this cake is some piped dollops of buttercream and sprinkles on the top! So easy!
I hope you enjoyed this cake, my friends! It really is a super easy design that will wow your guests. Below is the YouTube video I created on the making of this cake…. enjoy!

xoxo,

Supplies you may need:

Something happened this weekend, you guys… something that I’m still in denial about.

My baby girl, my first born and my oldest daughter turned nine! Nine!?

How is this possible? It truly feels like yesterday that this sweet little redhead was born. And now we are looking the end of her first decade in the eye.

Sigh.

So when this sweet one, who also happens to be mommy’s biggest fan, was asked what she wanted for her birthday cake this year and she replied (with a gleam in her eye) that she “had a challenge” for me, I knew this would be good.

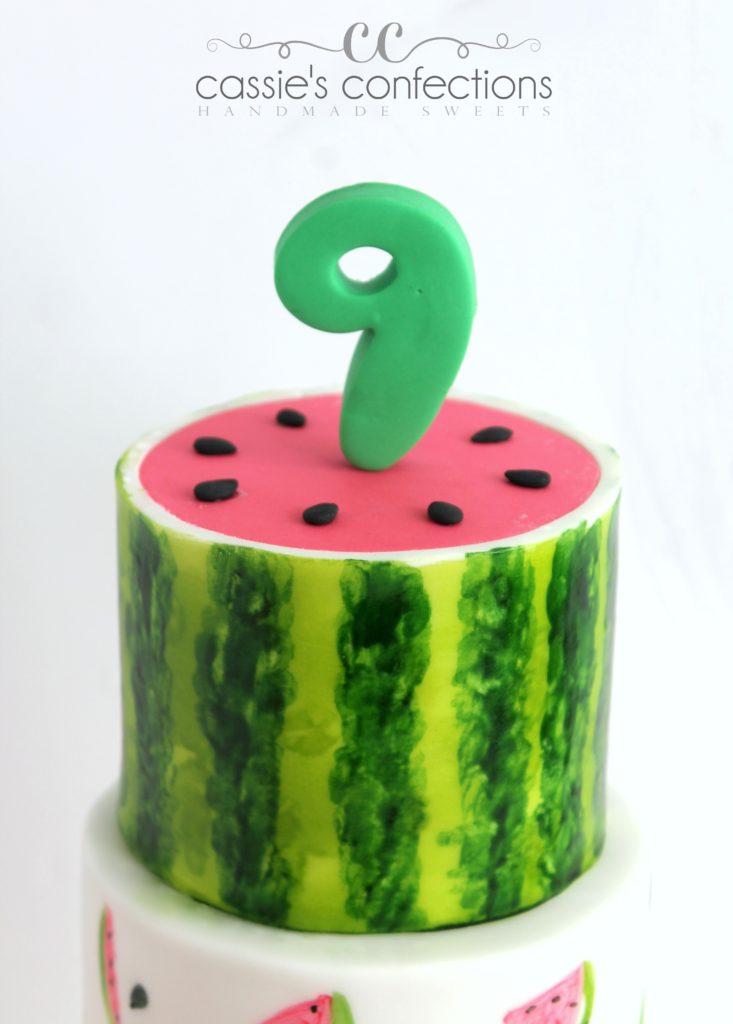
Her requested theme? “A watermelon sleepover”.

So, you know what? The girl got a watermelon sleepover!

The party itself was adorable! Watermelon balloons, plates and favors, along with various other pink, red and green details.

I decided to satisfy my need for a “pretty” cake with the actual cake, and use the decorations to create the sleepover portion of the theme. Since she was only having a couple of friends over and the cake size would need to be small, I opted to put the characters on the board instead of the cake.

I wanted to give my #1 fan an awesome sleepover cake, so I took it one step further and created the hand-modeled characters to actually resemble her best friend and cousin, the two sleepover guests at her party!

The characters are created out of fondant, and I used a brand new (unused) dish scrubber to give a sort of carpet texture to the fondant on the board.

I hand-painted the entire cake itself, and I put together the video tutorial below to show how I created the top watermelon tier!

My sweet girl was so thrilled when she saw her cake! Creating my own kids’ birthday cakes bring me so much joy!

Tools used in this project:

This week I created a shoe-lover’s dream! A shoe… cake!

When a return customer contacted me to order a cake for his wife, I was thrilled because, as I told him, I love making grown-up girl celebration cakes! He then told me about his wife’s love for shoes and I knew this would be a fun one.

I had just one week prior seen an amazing magnetic shoe mold via a YouTube video and had to pull my finger away from the purchase button about three times, reminding myself that I had no immediate use for it. Side note: does anyone else find humor in the fact that I had to use self control not to buy a shoe mold?? That is a true cake decorator for you! I will count my husband lucky (and we won’t discuss my handbag addiction). 😉

Anyway, I immediately jumped back online and grabbed the shoe mold that had been my heart’s desire. When it arrived, I eagerly sliced open the box and ran downstairs to my bakery, and it only took me one wasted try before I found success!

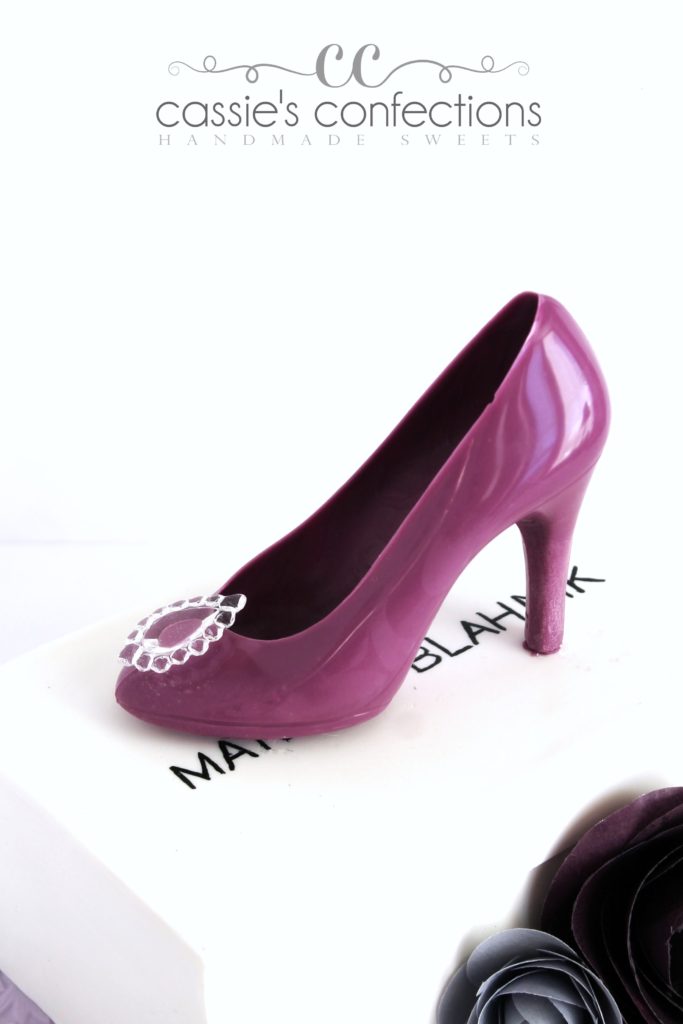
Isn’t that a seriously gorgeous, shiny, smooth piece of chocolate “designer” footwear? I added the edible jewel for more wow, and I’m really not sure if I wanted to eat it or wear it! Hopefully my customer felt conflicted in the same way.

I then created a “shoebox” cake in a similar manner to how I created last week’s chocolate box cake (you can watch the video here), but with modeling chocolate since my customer is not the biggest fan of fondant. I did a 50/50 mixture of modeling chocolate and fondant only for the top panel in order to be able to paint the logo on the top (food coloring beads up on modeling chocolate).

I used the fabulous wafer paper rose tutorial from Cakeheads.com to add a beautiful detail next to the shoe box. I printed my wafer paper two shades of purple using my edible printer.

I put the cake on a textured fondant cake board and was done!

This cake made my eyes happy!

Tools used in this project:

Classes you might enjoy:

Happy holidays, my friends!

I recently had the absolute joy of creating these Christmas ornament cake balls… 192 of them to be exact.

Soon after delivery, I received a text from a fabulous cake friend in which she mentioned that she thought they were adorable, and then something akin to “I would rather jab needles in my eyes than do those” (you know who you are, if you’re reading this).

This was about the 50th time I have heard/read something similar from a fellow sugar friend, or seen the disappointment of a non-cake friend upon having to give up the idea of a fun project.

Here’s a secret: this was my actual first cake ball order… I’ve only done pops. However, I used my same method all the way up to and after the actual dipping with great success! So I’ve decided it’s time to put my method on record for all of you!

I created a video of the entire process. Don’t panic – it’s only 10 minutes long. Why? Well, video editing, but also mainly because the entire process from start to finish (with the exception of actually baking the cake, which you really don’t even need to do if you have cake scraps around!) took only around 45 minutes. It’s that easy!

Please enjoy this video, and also subscribe to my YouTube channel! I’d love any comments or suggestions you might have in your experience as well!

(Wish it would let me change the thumbnail away from my mug, but…)

Supplies used in this project:

While I could definitely get lost in a good stationary store, that is not what this post is about.

I really wanted to talk about the edible kind… frosting sheets! Wafer paper! Because the two make me just as giddy as (if not more than!) a brand new pad of pretty note paper.

Let’s be honest… when you think of edible images, you think of something like this…

edibleimagecake

Source: http://order.cakes.com

(Which is great! And also how grocery stores are able to charge what they do.)

In my time as a cake designer, I have really evolved in my thinking toward edible images and edible ink printers. I have graduated from feeling slightly embarrassed about owning an edible printer (feeling like maybe I am “cheating”) to loving every minute of it and always looking for opportunities to use it.

Why?

Because I have begun seen far beyond the colorful happy birthday sheet cake image, the simple Super Why image and the edible photo of the birthday child. I have seen the endless possibilities and the stunning details to be created using printed images and patterns!

Here is where it all began…

paisleyguitarcakewm

This was one of my first cake orders, and it was a little terrifying! My customer wanted a Brad Paisley guitar cake. I mean, paisley!?!?

But then I had an idea… and did a little online searching before running across the street to our grocery store to have them print this glorious paisley image. And the wow! People were even more impressed than I thought they would be!

So I began to dabble more…

teapartycake

And started to use images and printed patterns to enhance smaller details on my cakes.

hotwheelscakewm

Even going so far as to use printed wafer paper to decoupage, as in the top tier of my July 4th cake!

july4thcakefinal

I literally found an old copy of the Declaration of Independence, printed it on wafer paper and stuck pieces of it all over my cake… and that tier is one of my proudest.

It wasn’t until my polka dot cake that I finally let go of my inner struggles with using this simple medium.

polkadotcake

One of the cake designers that I admire most shared this cake to her page, and I couldn’t help but notice a comment on the post. Another cake decorator said something along the lines of “Well, it doesn’t look very difficult – just printed paper on a cake”. Which is true, and it was what I had been afraid of people thinking when she had first shared it… and her comment left me staring at my computer screen in confusion and embarrassment.

But then the wonderful cake designer replied to the comment. I don’t remember her exact words, but she basically responded that of course it was printed, but that it didn’t matter… and that a person knowing how to use their creativity, tools and resources to create something beautiful that makes people happy is a great talent in itself.

You cannot imagine what this did for me as a cake designer! I felt that I had been freed from everything that held me back from being proud of my cakes. No more secretly wondering if I had much talent beyond my tools. I was able to acknowledge the creativity and talent that it took to come up with an idea, seek out the tools and successfully create the cake. And I felt free to just have fun.

And now I happily seek out opportunities to add these unique touches to my cakes!

twowildcake

I am thrilled to have so many different mediums available to me, and I revel in the time spent discovering new ways to use them.

Cassiesignature

Tools used in this post:

Online classes you might enjoy:

waferflowersclass

waferflower2

waferflowers3

Wow, I’ve been busy lately!

Between orders and family, I’ve been neglecting my blog and all of my social media! I’m hoping to become a bit more active again after this week’s trip to Texas!

I have some awesome photos to share with you. First: cake!

This week, I was able to create a Brave-inspired cake. I have been challenging myself lately to get out of the rut of creating the same old cakes that are everywhere in the cake world… you know – the Minnie/Mickey Mouse ones, the Buzz Lightyears and various buttercream ruffles. I’m listing these ones because I’ve done them. Not to insult any of those cakes (if I did them for you), as I tried to add my own touches and make them as clean as possible so that you could have a unique version and I could still feel proud, but my heart is yearning for my own style to emerge. I am just trying to figure out how to allow this to happen.

This Brave cake was a great start for me! I chose to NOT search out the internet for ideas and inspiration as I normally do. Thanks to Kara’s Couture Cakes for that bit of advice… it’s too easy to have a cake become just another cake because of the other cake images that you can never erase from your mind once you’ve seen them.

I also did not want to violate any copyrights by using logos or exact characters, so I literally closed my eyes and thought through the main details of the movie that stuck out to me. I came up with a few things… Merida’s turquoise and green dresses, hair, the wisps, tapestry and her bow and arrow (luckily, the bow and arrow were my client’s one creative request).

After brainstorming, playing the workability of ideas out in my head, considering the budget my client wanted to stay within (not that I would not want to give it my all but some of those ideas would be very time-consuming), considering the limitations of my medium (my client wanted buttercream), I settled on a design.

I put my design together, and here was the result…

brave-cake-final

I was pleased!

I took special care with the bow and arrow, as this was the birthday girl’s one request.

bravecaketoppers

The bow and arrow are created with gumpaste. The only non-edible item was the twine used as the string. Sadly, the exposure makes it so that you can’t see in the photo that I created the feather on the end of the bow using wafer paper.

Afterwards, I decided to peek around online and discovered that the tie is not the most original idea, but I definitely gave it some beautiful detail and feel proud of it for that reason! I think little Olivia was pleased!

graphic

And now for another exciting part of my last few weeks!

If you follow me on Facebook or Instagram, you may have already seen my beautiful new kitchen that my husband surprised me with!

bakerymainwall

bakeryovensandcloset

bakeryovens

bakeryworkspace

bakerylogo

Amazing, right?? I have the best, most supportive husband in the world.

So this is the new Cassie’s Confections bakery! Being in my own beautiful space has already been so inspiring!

Lastly, I read on a cake blog once that part of my online presence should include a bit of personal information, as people want to know me. I don’t usually do this, but I am taking it to heart this time and sharing a recent achievement that I am so proud of!

I have been training in Taekwondo for five years now. I started training with my dad (a black belt) and over time, three of my littles have joined me. They have so far achieved their red, blue, and white belt with yellow stripes. A couple of weeks ago, I earned my 2nd degree black belt!

belt

Here is one aspect of my test – I broke 3 boards at one time with a step-behind side kick.

middle

I love this special activity and exercise that I can do with my babies, and I truly believe that training AND cakes keep me motived for each other in a way.

Anyway, I’d love to hear your comments or questions on anything in this post! I’m hoping to get more videos up on YouTube soon, as my subscriber list is growing slowly but pretty steadily (if you have any video requests, please let me know!)! If you haven’t already subscribed, please do so here!

Cassiesignature

Some supplies used in this project:

Classes you might enjoy:

betterbuttercream

Wow, what a busy week it has been! I feel like I have barely had a moment to breathe, let alone stay on top of my social media and website. Phew!

I just wanted to share a fun woodland-themed baby shower cake that I was able to create this week!

woodlandfoxcake

Although I was exhausted from the 370 cookie order I also had to complete this week, and the cake I created the day before this one, I was able to relax and enjoy almost every moment of the making of this baby shower cake!

You all know that the mention of rustic, woodsy, “messy” type cakes often sends me into a slight bit of panic, but I think I handled this one pretty well!

woodlandfoxtoptier

The sweet little foxes gave me their share of trouble, but my wonderful husband assured me that they did, in fact, look like foxes. Now that is love, right? 😉

That beautiful birch tree tier is an image that I purchased on Etsy and printed as an edible image.

Now let me tell you something about edible images, friends… ain’t no shame in using them! I searched high. and. low. for the perfect image for this cake… I’m talking definitely more than one hour of scouring the internet using every search term I could think of to try to make Google understand my vision. That is not the easy way out, and a perfectly chosen and placed image in the perfect color can be the wow factor on your cake.

The bottom tier was my favorite!

woodlandfoxtrunktier

This tree trunk tier was a first for me also. A woodgrain impression mat, some awesome clay carving tools, and some hershey brown petal dust created this fun, slightly realistic yet slightly cute and whimsical tier.

I was pretty pleased with the final result!

woodlandfoxcake

Leave me a comment with questions about any other details of this cake and I am happy to answer!

Cassiesignature

Tools used in this project:

For some other fabulous tree trunk and bark methods, as well as many other texture tutorials, I recommend this class:

cleanandsimpleclass

Hello, all!

What a fun week it was in my kitchen! This week I had a request that challenged me a bit at first. My wonderful customer wanted a birch bark cake… nothing I haven’t done before (and seen a million versions of tutorials online for), but she wanted this cake to be a buttercream cake. This was new to me!

Naturally, the first thing I did was take to the internet for ideas on how to accomplish this. I found (as usual) tons of tutorials on rustic buttercream birch bark cakes, but none that matched my style. Everything I found resulted in a messy sort of birch bark cake.

I know, I know, why should a rustic cake of this style be neat? Here’s the thing: when I first started cakes, I struggled so much with the “messy” cakes – the rustic cakes or more masculine cakes such as my Planes Fire & Rescue cake (which, coincidentally, has been my biggest success on Pinterest).

planesfandrcakewm

When I realized that “messy” cakes were likely just never going to be my thing, I decided to take the ideas given to me and neaten them up in my own style. For example, I was asked to do a four-wheeling cake, and here was my final result.

4wcampingcakewm

Clearly, this was before I realized the importance of good photography, (and the customer added the four-wheeling vehicles after pickup) but you get the idea. Instead of smearing the cake with chocolate frosting before covering with rocks and other debris (as would have been the most likely plan), I chose to panel it neatly with modeling chocolate and cover the tier tops with edible dirt instead. This way, it pleased my smooth-sided sensibilities but still made my customers very happy!

Back to the birch bark cake.

After feeling frustrated with the lack of ideas to achieve what I was picturing, I decided maybe I needed to find a fondant birch bark tutorial and figure out a way to translate it into buttercream. Well, I already had a version that I was in love with and had successfully created before… Shawna McGreevy’s birch bark cake! I followed her amazing tutorial for my sister’s baby shower cake earlier this summer, and was really pleased with the clean, beautiful results.

mollysbabyshowercake

Sooo… I did some mental planning and got to work.

What do you know… it was a success!

Birchbarkcampingcakewm

This is buttercream, people!

I was very pleased with the way it turned out and with only one bump in the road, to the tune of my airbrush failing on me, which I rectified by hand-painting the top of the stump. And in fact, I know that I spent more time trying to fix my airbrush than I did painting the top. Isn’t that always the way?

Anyway, I filmed myself creating this cake just because, and was able to edit it into a short little bit of cakey fun!

Keep in mind, the original birch tree cake tutorial that I used came from the brilliant mind of Shawna McGreevy here! I simply adapted it in my own way to buttercream!

 Enjoy!

Cassiesignature

Tools used in this project:

This is a test post!

If you are subscribed to this blog, you have likely been receiving blank blog posts in your inbox. I apologize for the mistakes! I am working diligently to resolve the issue.

Thank you!

Cassiesignature

Hello, my friends! The best thing about today? It’s Saturday.

<happy sigh>

With all of the cake orders I have had in the last few weeks, I have to say that a week jam-packed full of cookies was a welcome change! While cakes are definitely my favorite creative outlet, there is something so relaxing about piping cookie after cookie, and I think everyone knows by now that I love creating beautiful things in smaller sizes.

Here is but one set that resulted from this week’s labor.

teachercookiesfall2016

I hope they will put a big smile on our teachers’ faces!

I also pulled out my video camera for a little while and put together this fun video of the making of the chalkboard cookies. It is short and fun!

If you know anything about me, you likely know that I started decorating cookies basically out of nowhere three years ago. I take pride in all that I have learned, developed and grown when it comes to my business, especially because I am self-taught (with the help of the internet).

Incredible amounts of learning and studying up have lead me to where I am in my cake and cookie decorating!

I am guessing there are so many other people out there like me, who have had an interest but never known where to start! A few basic YouTube videos and Craftsy classes really cleared up the basics for me and gave me enough base knowledge to move forward!

I am so passionate about online learning, because the knowledge is really at your finger tips.

One of my very favorite online learning avenues, Craftsy, is having a wonderful sale this weekend… 50% off of their NEW classes!

day1_cake

This includes a class I have taken (ok, a TON of classes I have taken, but ONE in particular), by my absolute cookie idol Callye Alvarado of Sweet Sugarbelle. Must. have. this. class. Seriously – a class by Callye for UNDER $20. If you have been at all tempted to give it a go, this is a great place to start.

Step-by-Step Cookies: Animal Birthday Party

I love to share my passion for sugar… it has brought so much joy into my life and I know it could for some of you also!

Cassiesignature

Tools used in this project: